
Copyright © 2024, Emi Harrington (Do not give away or sell this pattern, copyright protected.). This pattern may be printed for your personal use only. You may not in any form, reproduce, transmit, give away or distribute this pattern, including but not limited to images, diagrams and text, through any venue, including photocopying, other electrical or mechanical means, recording, or any other information storage and or retrieval system. Permission is granted to sell your finished garments.
If you have questions about this pattern, you may email me at: mehartgallery@gmail.com
HOW TO SOFTEN STIFF YARN:
https://www.youtube.com/watch?v=dcHU2h3SkrQ
HOW TO:
Cast on: https://www.youtube.com/watch?v=_iocTxgfLqU&list=PL8JcOsK0nf1L4RVaar-hbVuTc1AVqrutu&index=5
Knit stitch: https://www.youtube.com/watch?v=PpJyef0ewFc&list=PL8JcOsK0nf1L4RVaar-hbVuTc1AVqrutu&index=4
Purl stitch: https://www.youtube.com/watch?v=L2dkEiTDxCw&list=PL8JcOsK0nf1L4RVaar-hbVuTc1AVqrutu&index=3
Cast off: https://www.youtube.com/watch?v=p_QLYZG1lcU&list=PL8JcOsK0nf1L4RVaar-hbVuTc1AVqrutu&index=2
Sew a seam in knitting: https://www.youtube.com/watch?v=S5UXKaYctAg
MY FREE VIDEO TUTORIALS ON YOUTUBE: https://www.youtube.com/c/Hectanooga1/videos
MATERIALS:
2 strands of ww yarn (100- 250 yds)

8 mm knitting needles (worked flat)
Yarn needle
Ruler or measuring tape
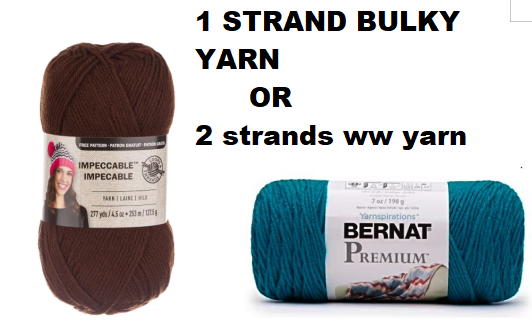
BERNAT SOFTEE CHUNKY YARN
https://amzn.to/3cPqHq9 (Affiliate link)
OR 2 strands of ww yarn
BERNAT PREMIUM YARN
https://amzn.to/3OH7e8L(Affiliate link)
LION BRAND LOOPS & THREADS:

https://amzn.to/3Gj5Acj
NSTRUCTIONS: Gauge: 2.5 AND 3 ROWS = I SQ. INCH
Copyright: Emi Harrington,permission not given to share, give away, or sell this pattern.
You can find ALL my patterns on Ravelry: https://www.ravelry.com/designers/emi-harrington
Including over 500 FREE patterns.
ALL MY KNITTING PATTERNS ON RAVELRY:
https://www.ravelry.com/patterns/search#sort=best&inline=&query=emi%20harrington%2C%20knitting
ALL MY KNITTING VIDEOS ON YOUTUBE:
https://www.youtube.com/c/Hectanooga1/search?query=KNITTING
AND HERE:
https://www.youtube.com/user/HectaFavorites/search?query=KNITTING
My focus in designing is to produce a pattern in the most simple manner, so please don't be disappointed at how easy my patterns are.
1. With 2 strands of ww yarn and 8 mm needles: Cast on:
5-8 yrs: Cast on 16 stitches
8-12 yrs: Cast on 18 stitches
12-16 yrs: Cast on 20 stitches
Adult S (women shoe size 6-8; men:5-7): cast on 22 stitches
Adult M (women: 8.5-10.5; men:7-9): cast on 26 stitches
Adult L (women: 11-13; men:10-12: cast on 30 stitches
Adult XL: (men: 13-14): cast on 34 stitches
2. *Work in k1p1 across the row.

*repeat from * until the work measures:
5-8 yrs: 6.5 inches
8 - 12 yrs: 7 inches
12-16 yrs: 8 inches
Adult S: 9 inches
Adult M: 10 inches
Adult L: 11-12 inches
Adult XL:13 -14 inches
KNITTING BAG https://amzn.to/41fFcLm (Affiliate link)

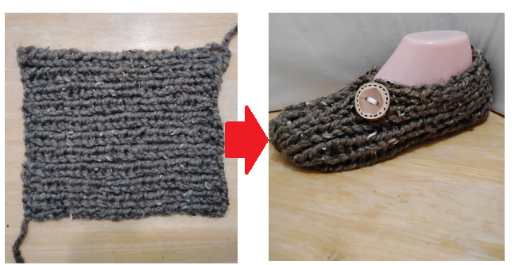
Cast off with a long yarn end.
Thread it into a needle, weave through the last row of stitches,
pull to gather and close the end of the slipper,
then sew the top of the slipper, sewing 1/2 the total length.
Sew the heel end closed.


